
How to Connect Your MCP Server
Connect your AI agents to HubSpot data in minutes. Simple setup, powerful results – works with Claude and ChatGPT.
For Claude (Web, Desktop & Mobile)
Available on web, desktop and mobile. Configure it online on https://claude.ai or via desktop client, use it anywhere.
You can do this entirely from your phone. Claude lets you connect to remote MCP servers directly from claude.ai on any device. Just open your browser, visit claude.ai, and you're ready to connect. With Claude, you can set it up while grabbing coffee.
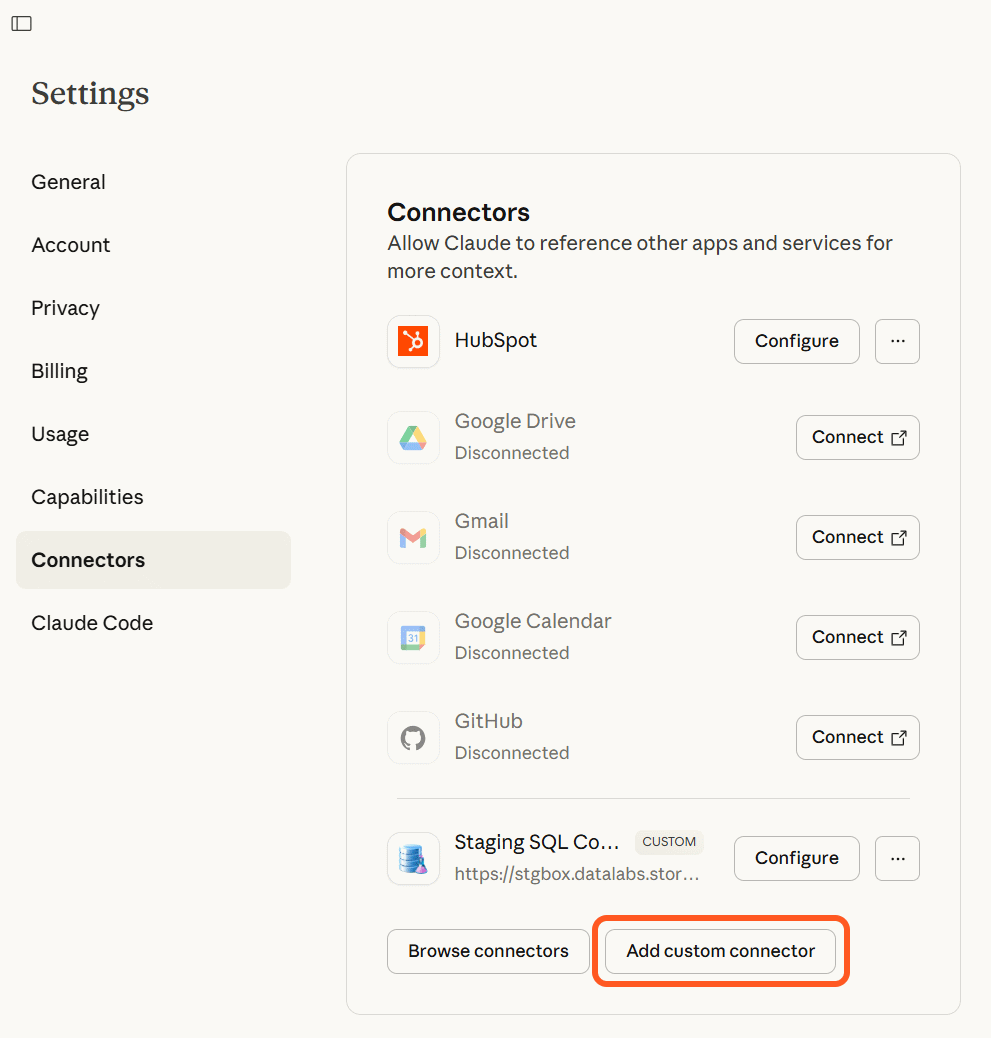
Navigate to Settings → Connectors to Add a new connector
Open Claude (on web, desktop, or mobile) and go to Settings, then select the Connectors tab. This is where you'll manage all your MCP connections.
Click "Add Custom Connector" to add a new MCP server
Enter Connector Details
Name it as you want it to appear and be referred to, then paste your MCP endpoint URL provided with the subscription.
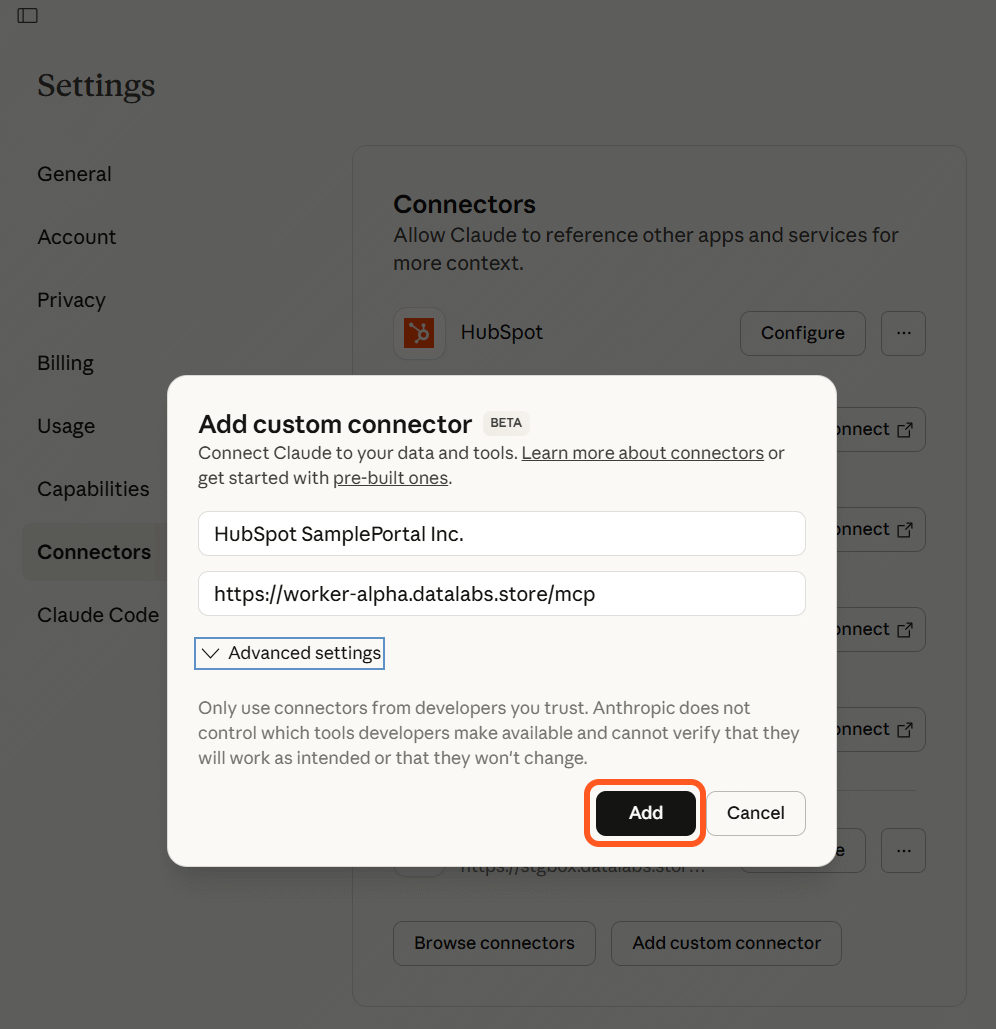
Authorize Claude to access your data
The connection is configured and awaits for human authorization. Click connect. You will be redirected to DataLabs.Store website to confirm the connection
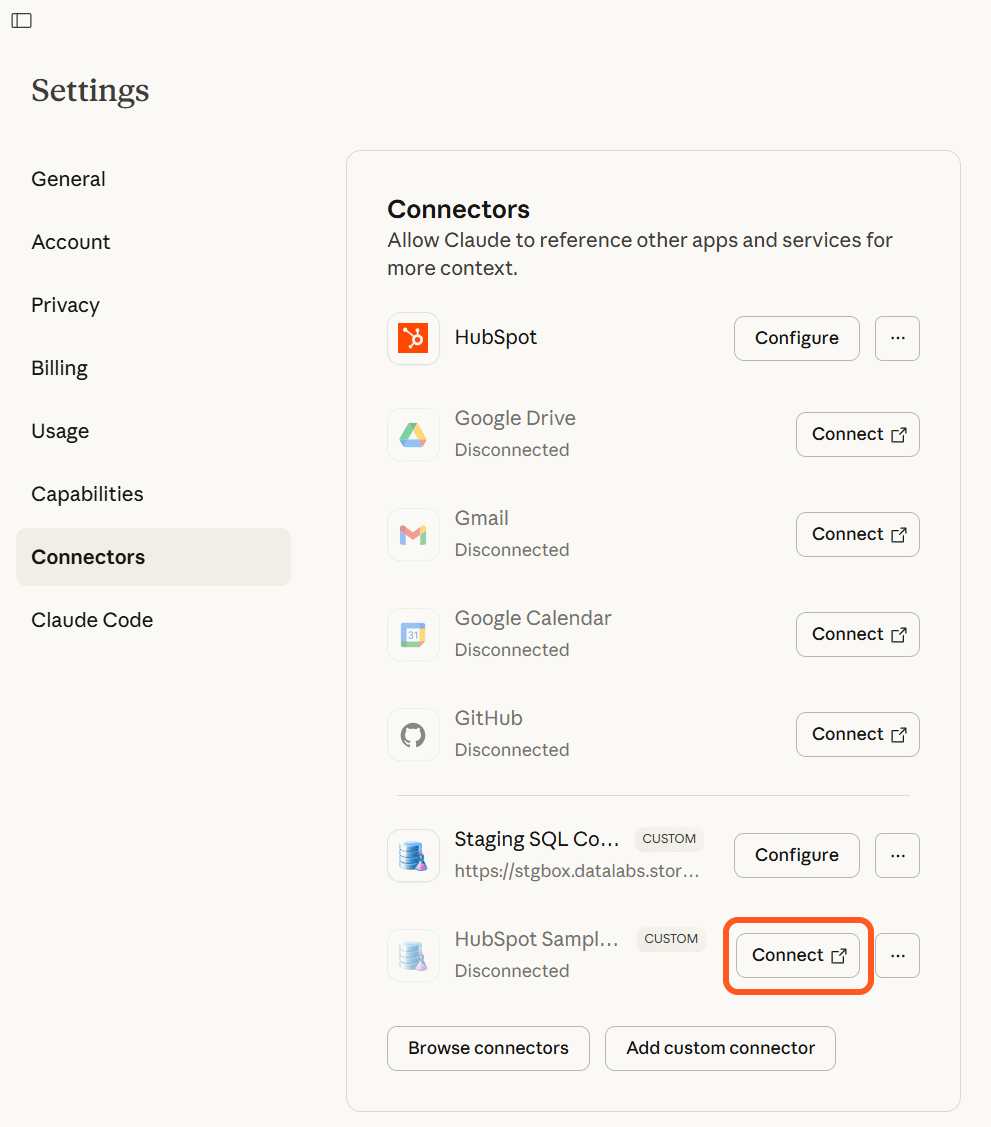
Note: Our MCP servers support OAuth 2.0 authentication. No secrets, headers or any other configuration required.
Confirm the connection
Select the Hubspot portal and its database you would want to connect to, or choose "Request Demo Access" to connect to our Demo portal

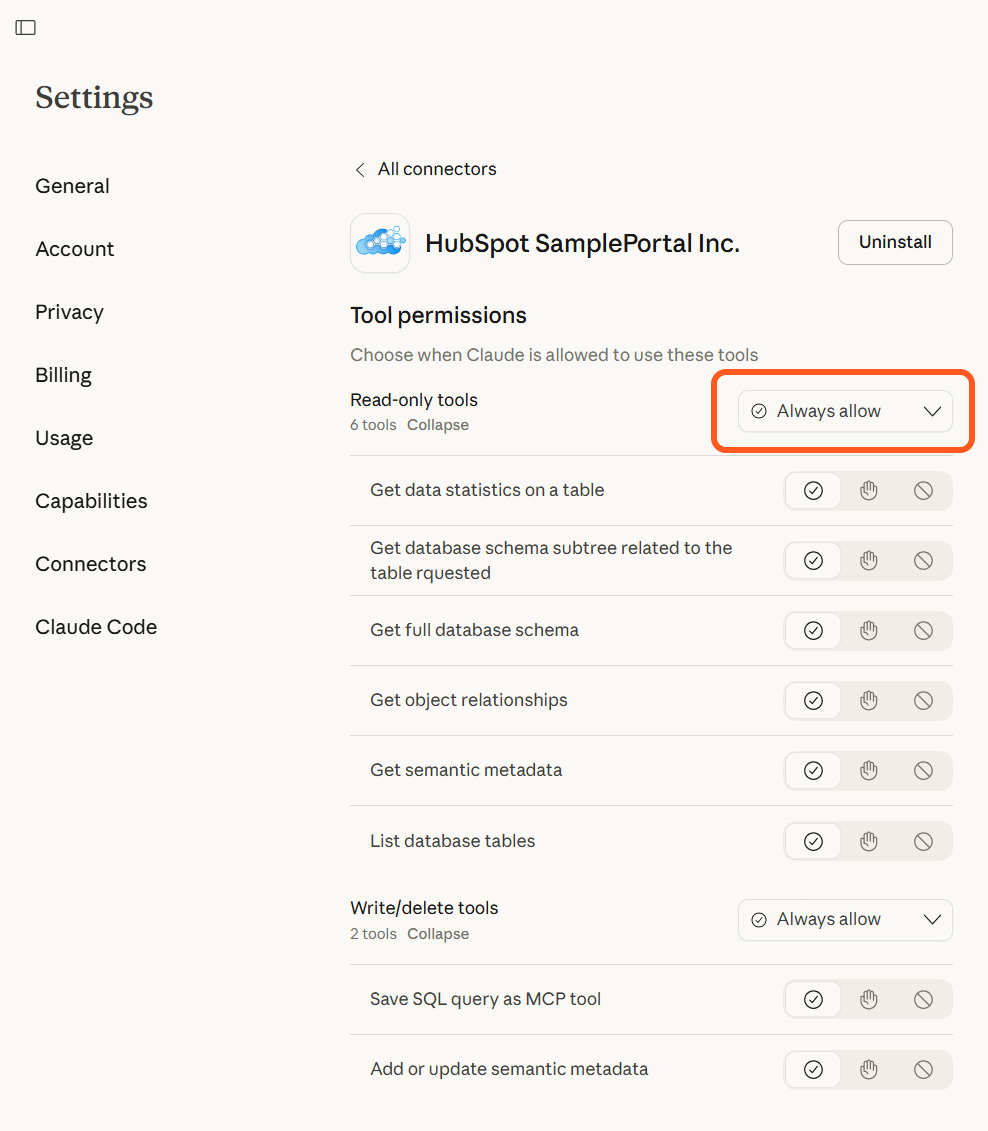
Review the connector details
Once added, your connector appears in your list with all its available tools displayed. There's nothing else to configure, although you may take a look and preselect the privileges assigned to individual tools the product offers. Hit "Configure" to do so.
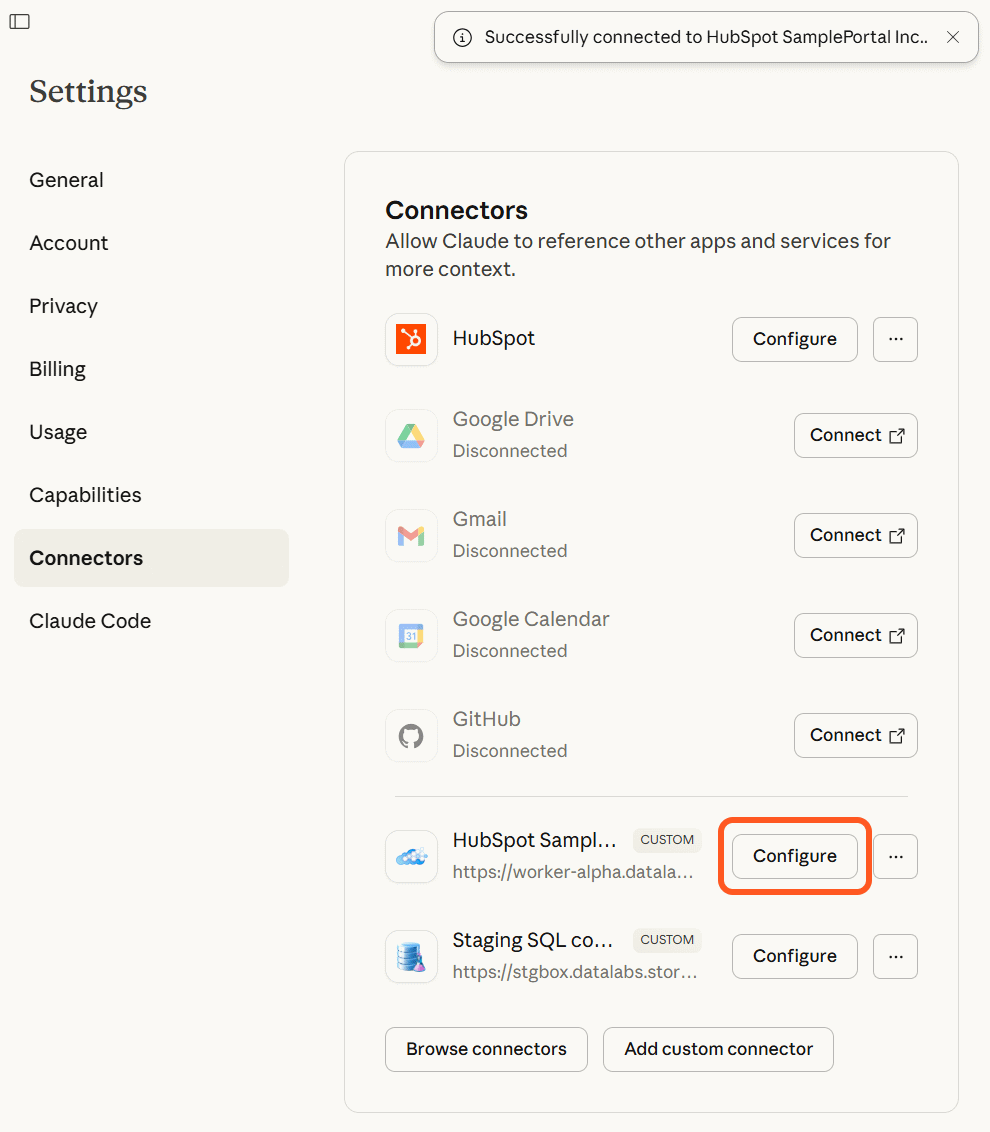
Your connector is ready
The job is done. You can immediately start using these tools in your conversations with Claude, and they'll work seamlessly across all your devices.
For ChatGPT (Pro and Plus subscriptions)
Available on web and desktop client with developer mode turned on.
ChatGPT's MCP integration requires web or desktop application with developer mode enabled.
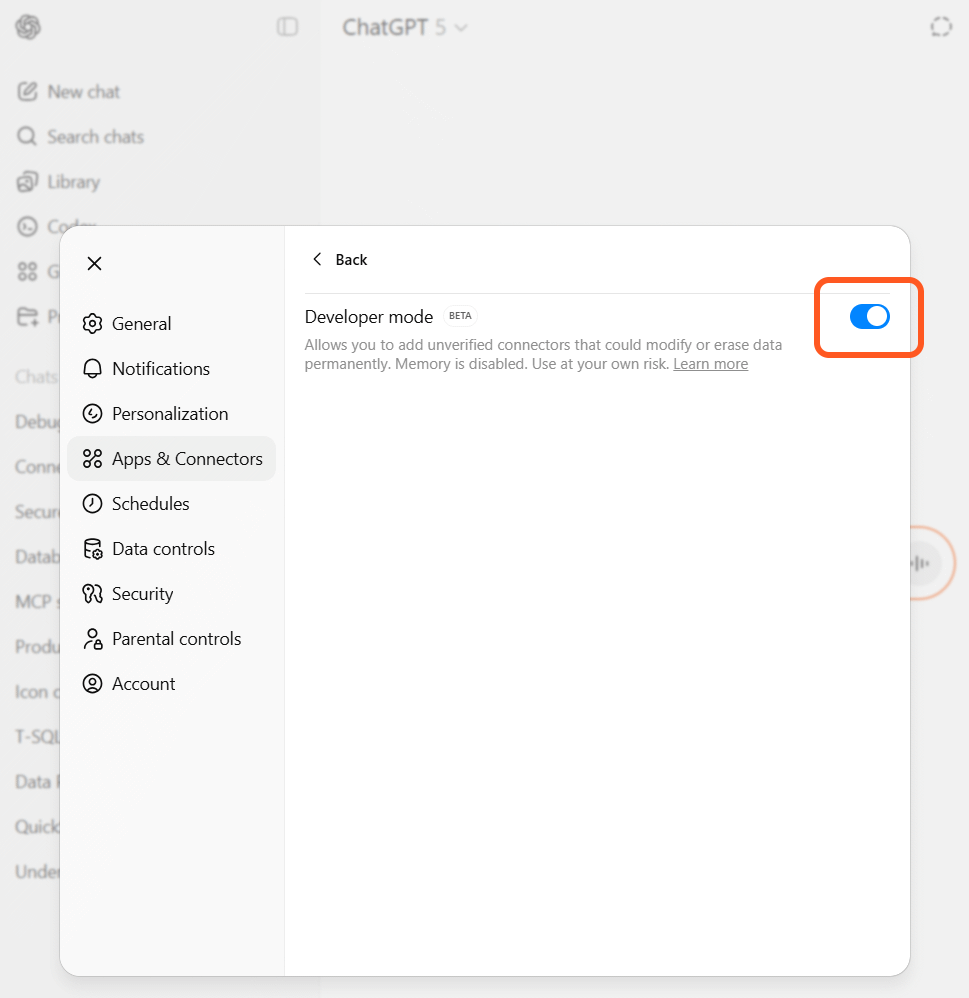
Navigate to Settings → Connectors → Advanced and enable Developer Mode
Open the ChatGPT web or desktop application and go to Settings, then Connectors, then the Advanced section. Toggle "Developer Mode" on to unlock MCP functionality.
Click "Create" to add new Connector
Once developer mode is enabled, a "Create" button appears in the top right corner. Click it to open the connector configuration dialog.

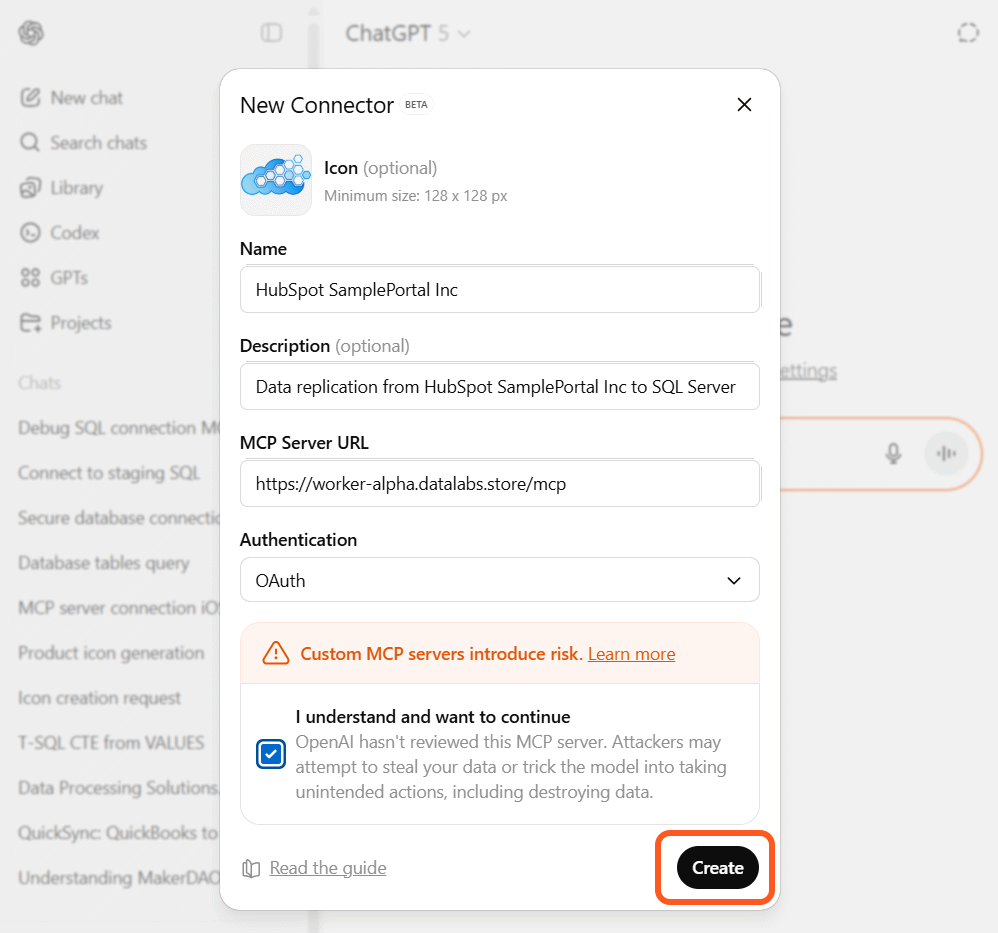
Enter Connector Details
Name it as you want it to appear and be referred to, then paste your MCP endpoint URL provided with the subscription.
Confirm the connection
Select the Hubspot portal and its database you would want to connect to, or choose "Request Demo Access" to connect to our Demo portal
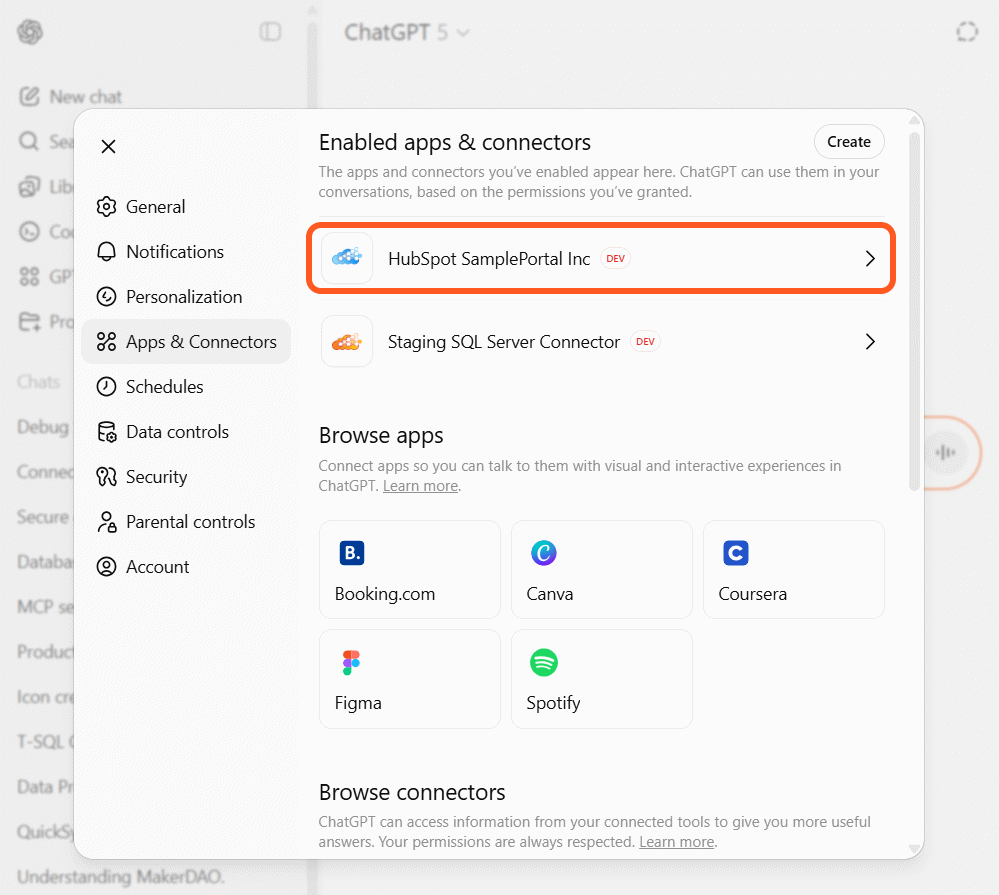
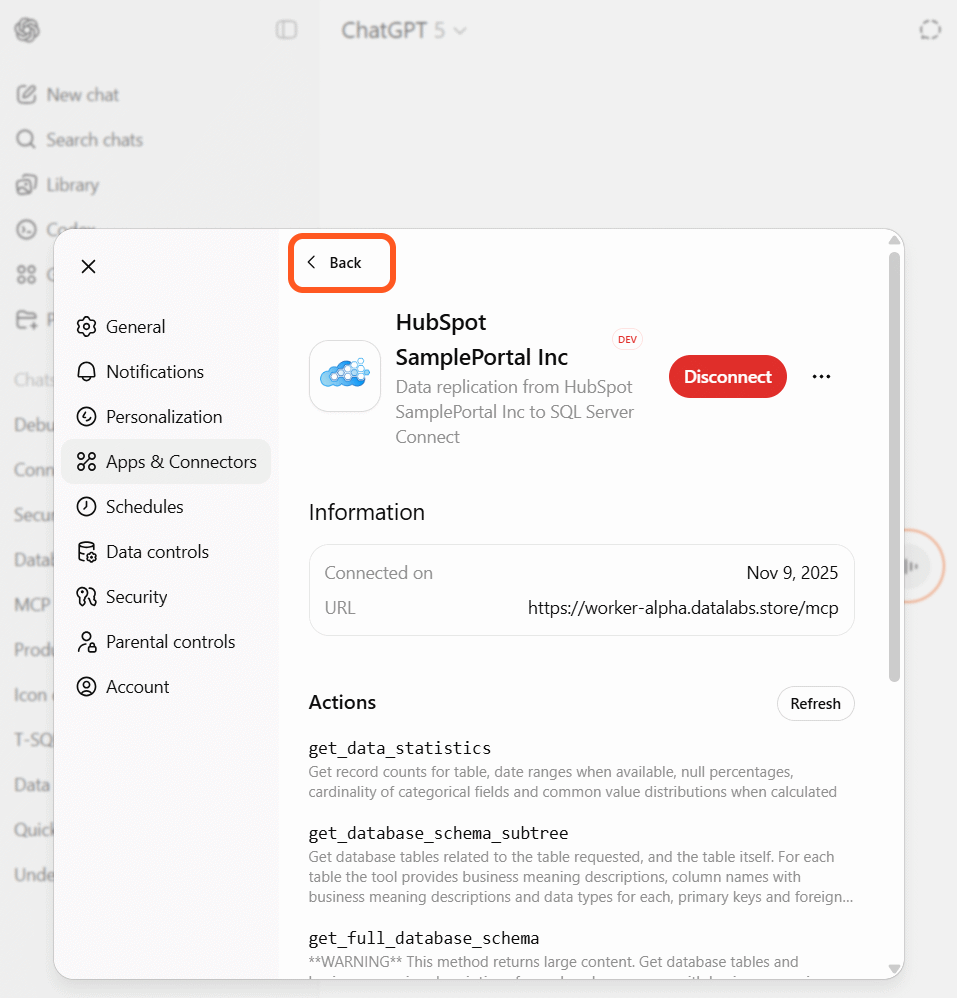
Review the connector details
Once added, your connector appears in your list with all its available tools displayed. There's nothing else to configure, although you may take a look and preselect the privileges assigned to individual tools the product offers.
Your connector is ready
The job is done. You can immediately start using these tools in your conversations with ChatGPT, and they'll work seamlessly across all your devices.
Ready to Connect Your AI Agent?
Start analyzing your HubSpot data with the power of AI in minutes.
Get Started Now